How We Built an Online Course That Generated $120,679 in 5 Days
It was an odd choice for a SaaS company. But here’s why we’re glad we did it.
A few months ago, we announced that we would be launching a (paid) content marketing course.
We got a lot of positive reactions to the news (much of it extremely positive), and some negative (with a few comments being especially negative).
The course was scheduled to run for six weeks, starting in January, and it cost $799 per person, or $1,999 per person for an Elite version that included personal coaching calls with myself and Len.
The course quickly sold out, and a few weeks ago, we wrapped up the first six-week run.
We got some amazing feedback from students who were thrilled with the course:
I’m disappointed we’ve reached the end of @Groove‘s #Content Mastery class. It. Was. Awesome. You rocked it @LenMarkidan! pic.twitter.com/soEeWDcrtN
— Kate Harvey (@authorkate)
March 2, 2017
As well as some feedback that’s going to help us make the course better for the next run.
We put a lot of work into this course, and while we didn’t use any developer or product team time on it, we tied up our marketing resources for several months working on it.
Today, I want to pull back the curtain on why we created the course, how we built it, our strategy for pricing and marketing it, results from our first six weeks, and everything that we learned along the way.
This guide is going to be transparent: we’re sharing a lot, including the exact numbers, the good, the bad and everything in between.
It’s also going to be long: there’s a lot to share, and for that reason, we’re splitting it into two parts.
This week, we’ll focus on course development: how we built a six-week course from the ground up. And next week, we’ll talk about sales, marketing and execution.
If you have any interest at all in creating an online course—or just want to see how things look behind-the-scenes—then this post is for you, and I hope you enjoy.
Why We Decided to Build a Content Marketing Course
On the surface, it doesn’t make much sense for Groove to launch a content marketing course.
And there are a LOT of reasons not to do it:
- We’re a SaaS company, not an education company.
- We’re a small team, without a lot of extra resources for big projects like this.
- Customer service is our industry, and our focus. Not content marketing.
And those were all reasons that weighed heavily on us, as we debated whether or not to move forward with something that started as a throwaway idea at one of our planning retreats.
But ultimately, there were a few reasons that overcame the cons:
- We’ve gotten hundreds of requests for a course that taught what we talk about on this blog

- We knew that we had a lot to share, and a lot of value to provide. Providing value through content is how we’ve built our entire marketing strategy, and this would be an extension of that.
- There are enough out-of-the-box tools available that we wouldn’t need to pull product resources away to work on this; it would be entirely a marketing effort.
But as we began to lean toward the decision of green-lighting the course, we settled on two important caveats:
- If we were going to take the time to create a course, we were going to work hard to make it insanely valuable. This wouldn’t be a bunch of blog posts smashed together and sold as a course (as happens far more often than you might think). It would be rich, insight-packed and NEW content, much of it going deeper than anything we’ve shared before.
- We were going to charge for it, and it wouldn’t be cheap. This would help to compensate for our time in creating the course, but more importantly, it would ensure that we got people who were “bought in” and had skin in the game, and thus were likely to follow through on the content.
With “regular” content—like a blog—you can measure success with numbers like traffic, shares and backlinks.
But with a paid course behind a login portal, other than sales, the only real way to measure your success is by the success of the students.
We knew we’d have to work hard to make the students successful, but putting a high price tag on the course also helped us ensure that the students we got would actually act on our guidance.
How We Created the Course
In the end, there were five key elements that made up the final course: the overall content strategy, videos, worksheets, bonus content and the online community.
Below, I’ll walk through how we approached these elements, and what went right and wrong with each one, based on the results and student feedback from the first cohort.
1) Overall Content Strategy
While we’ve published hundreds of blog posts, creating a course is very, very different.
The three biggest challenges were clear:
- What do we actually put into the course? Which content would be most valuable?
- How do we find a balance between strategy and tactics? Tactics help by making the course actionable, but strategy helps you succeed over time (after the “tactics of the day” are no longer useful). We wanted to arm our students with both.
- When do we deliver the content? We’d need to spread it out over time, and pace it correctly so that students could keep up with the work.
We knew that we wanted to be able to promise something with the course. We didn’t want it to just be “content marketing 101.”
And while we can’t actually promise financial success (that depends on many outside factors), we could promise, based on everything we’ve learned over the last five years, to teach students to build a content marketing “system” from the ground up.
So that’s what we set out to do.
We thought about the different parts of a content marketing machine, and broke it down into five modules. Along with a “welcome” module, we spread the course over six weeks, with one module each week.
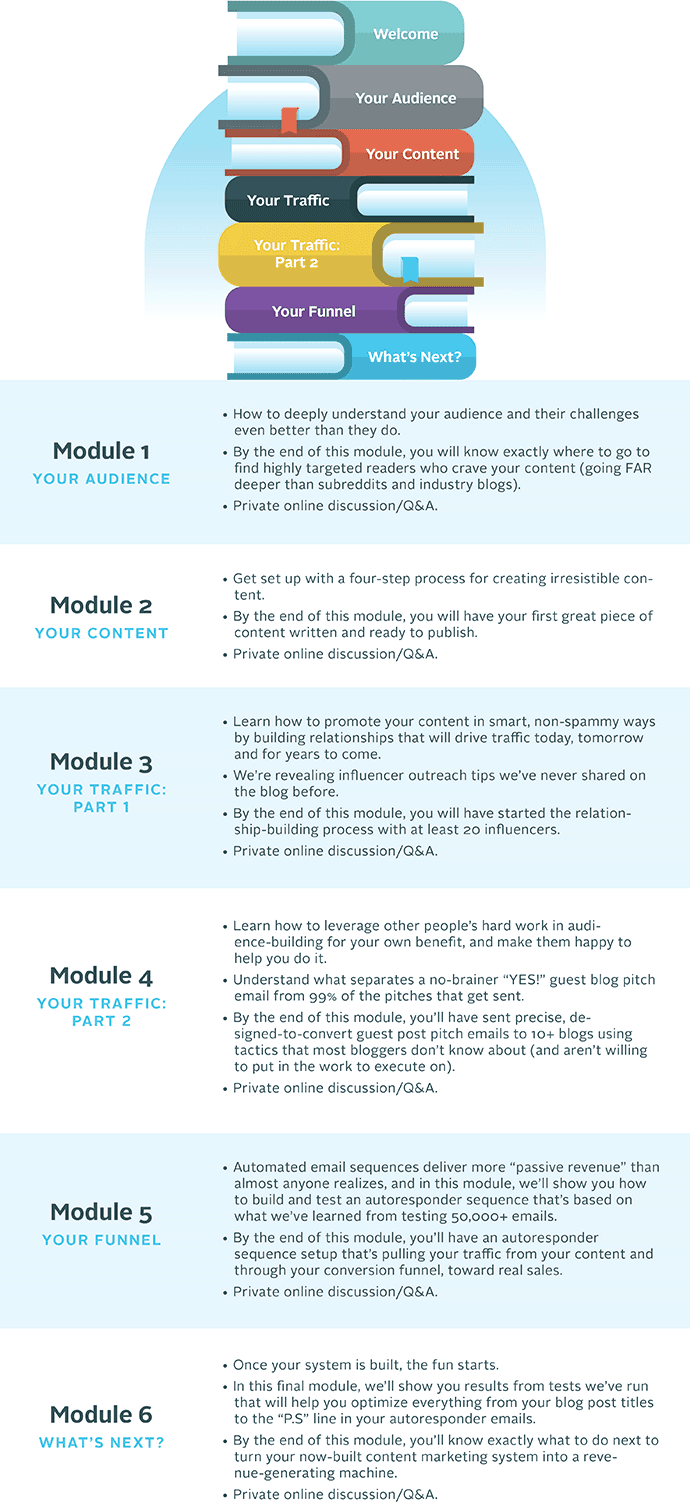
Overall Content Strategy
What worked: We were really happy with how the modules ended up looking, and the progression made it simple for students to follow a “path” to success, rather than learn a whole bunch of disjointed information at once. Our feedback surveys were overwhelmingly positive on the content strategy.
What we could have done better: Just as overwhelmingly positive as students were about the content, perhaps the most common piece of negative feedback that we got was about the pacing.
The first 3 modules were nicely timed. However after the 3rd module where we were getting feedback from influencers, editing etc, the 4th module came out which also involved some back and forth. So now module 5 and 6 came out and I’m still working on the home work from 3 and 4. I feel like if they were paced so the homework could get done that would make it a slam dunk.
— Student Feedback
A lot of students struggled to keep up. We had planned for the course to require about five hours of work per week, and we were upfront about this, but we could have done a better job of giving students more time to work. Even five hours per week is tough for someone with a full-time job and outside commitments, so next time, we’ll likely pace the course even more slowly and have it go a bit longer.
2) Videos
We decided early on in the course development process that videos would be the core delivery mechanism for the content.
It’s faster and more engaging than written content, and it’s a lot easier and more digestible to share a lot of information via video than via text.
Out of respect for students who paid for the content, I won’t share the videos here, but after recording dozens of videos, and scrapping dozens more, four key common threads appeared among the videos that went over well, versus those that didn’t.
The best videos—and the ones we put into the course—were:
- Short. 5-10 minutes each. This kept them watchable in a single session without needing breaks.
- Example-heavy. Lots of screenshots showing how to do things, rather than just explanations.

- Positive. In a six-week course that contains a lot of work, it’s easy for students to get discouraged along the way. So we used the videos as an opportunity to add emotional upticks to encourage students. We didn’t just tell students what to do, but we tried to paint a picture of how great things would be once they did the tasks.
The videos were recordings of slideshow presentations, with Len’s voiceover, with intro and outro animations at the beginning and end.
Creating the videos was, by far, the most time-consuming part of the course development process (other than actually coming up with the content). It took many, many hours… more on that later.
Videos
What worked: The content, in general, worked really well. Students gave us really positive feedback on the three key elements above.
What we could have done better: We’ve had a number of comments that asked for the videos to go beyond the “presentation format” and include face-to-camera video to make things more personal. And in hindsight, this was a missed opportunity to build a deeper connection between us and the students. It’s definitely something we’ll be adding for the next run.
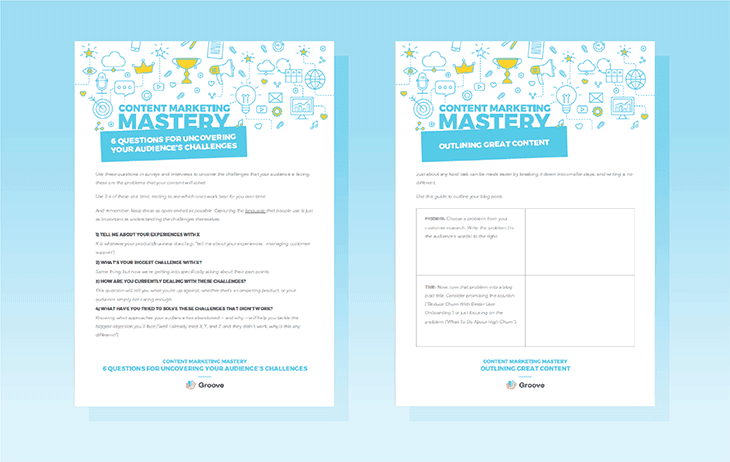
3) Worksheets
Accompanying each video module were a set of PDF worksheets to guide students through the module’s assigned tasks.
There was a mix of “fill in the blank” worksheets, and bonus guides that included tips and strategies that we didn’t include in the module.
Worksheets
What worked: Having an additional media format to complement the videos ended up being really valuable for students. Not everyone learns best through video—and different people struggle with different concepts—so we heard from many that it was helpful to have many of the concepts explained in more detail in worksheets.
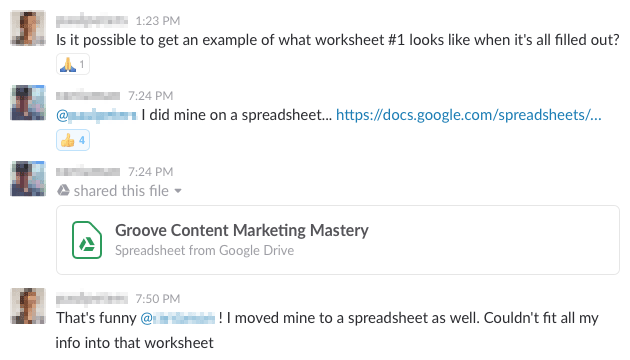
What we could have done better: Format. The worksheets were PDF’s, because we thought that this would make them easier to print and fill out. However, we greatly overestimated how many people would actually want to print them. It would have been better if we used digital worksheets, or online forms/spreadsheets that students could easily edit online.
Some students even made their own versions of this, and next time, we’ll switch to this approach.
4) Bonus Content
In addition to the core content, we added a number of bonuses to make the course more valuable for students.
There were two types of bonus content:
- Influencer bonus content
- These were interviews with people like Noah Kagan, Hiten Shah and Andrew Warner.
- For each interview, we included the full audio of the interview, along with a transcript for those that would prefer to read rather than listen. In some cases (like Andrew’s), we created PDF worksheets using quotes from the interviews.
- Additional content
- Some content didn’t fit easily into our modules, but we thought that students would benefit from it, so we added this content as bonuses for students to consume once they were done with the core work.
Bonus Content
What worked: By and large, these were a big success. Students loved them, especially when they got to hear from experts that they respected. Some mentioned that it was “special” to have well-known influencers record content specifically for our private group.
What we could have done better: We hardly received any negative feedback on these at all. They were a big win. Next time, we’ll probably try and add richer media (like video interviews).
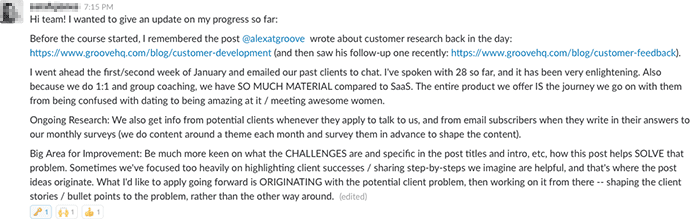
5) The Online Community
We wanted the course to be more than a one-way street; we wanted to create a community of students who would share ideas and help each other out as they traveled the same path together.
To do this, we used Slack to create a private group. We made clear that Slack would be where all of the course discussion would take place, and it worked: 100% of our students joined the group.
Each week, Len would post an announcement when a module was released, in a channel created specifically to discuss that module:

Students would ask questions…

Get answers…

Share their progress…
And help each other.

Having the Slack community also meant that when a student’s question was answered, everyone could benefit from the answer, rather than just that student.
The Online Community
What worked: The community was incredibly valuable for those students that chose to actively engage in it. A lot of them told us that it was the most valuable part of the course.
What we could have done better: …but not everybody chose to actively engage, and those that didn’t probably didn’t get much value from it.
For next time, we’ll be working on ways to structure the community that encourage more discussion (for example, sending emails to remind students of upcoming Slack discussions, and emailing “featured” comments or stories from that week’s Slack conversation).
How We Built the Course: The Tools
It’s never been easier to build an online course.
Here are the tools we used:
Course Platform: Podia

We started building the course using a platform that ended up being really clunky and hard to customize, and Podia stepped in and saved us.
Simply put, it’s the simplest and best course software we tried. The product is beautiful, adding and rearranging content is as easy as drag-and-drop, and support is fast and helpful.
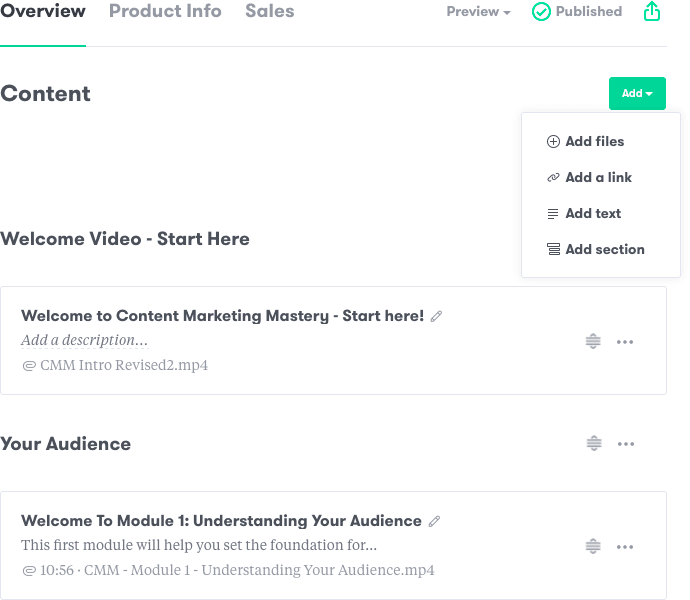
We also got a lot of positive feedback from students on how great the platform looked.
The price ($29/month for their cheapest plan, $99/month for the highest tier) is very reasonable, too, and I’m confident recommending this to anyone looking for simple course software.
Screencast Recording Software: Camtasia

We used Camtasia to record and edit the course videos. It was easy enough to navigate, though we did run into some trouble with resolution loss during export. This is something that we’ll need to look into further, and it’s enough to make me hesitate before recommending the app.
Interview Recording: Skype + Piezo

We used this combination for running and recording audio interviews for our bonuses. Skype is standard, and everyone knows it. Piezo is a Mac app that makes it easy to record Skype calls, it hasn’t failed us in the four years we’ve been using it, and for $19, it’s a steal.
Online Community: Slack

While many online courses use private Facebook groups, we opted for Slack. I’m glad that we did, but it does have pros and cons.
On the plus side, it’s engaging, much easier for live Q&A than Facebook, and far, far simpler for tracking and following discussions.
On the other hand, it does require students to be on Slack, and certainly, fewer people are on Slack than on Facebook. However, Slack continues to grow quickly, and I don’t expect this to be much of a consideration in the very near future. We’re happy with Slack, and will continue to use it.
Next Week: How We Sold Out Our Content Marketing Course in One Week
If you’re considering building an online course, I hope that this post was helpful for you.
Next week, we’ll turn our attention from course development to sales and marketing.
Specifically, we’ll share everything that we did to price, market and sell the course, including the exact tactics we used to make the course sell out in less than a week.
I hope to see you here next Thursday.